Down with the details
This week’s work was spent mostly in the front head lock or “failed shot” position and attacking.
I originally learned this position from a wrestling background and perspective. Still, I consider turning the corner and forcing my opponent to the turtle position to attack positionally and get them flat or turned over to their back. Although, this is not our only option when grappling for training for self defense. From the front head lock position, we have two options:
- Positional Attack
- Submission Attack
Both of which require proper control to get to.
Let’s consider our starting point, entering the front head lock. This can happen from a few different places. First, you could initiate the front head lock from a snap down whilst standing. We trained this mid December. Second, your opponent could shoot for a takedown and your impeccable takedown defense skills lead you to sprawl and end up in the front head lock position. Lastly, your opponent can turtle up on you. I hope for your sake, and Mel’s, this isn’t you. No matter how you get there, you have to dominate your opponent there by using some detailed controls.
Finding the position can start to seem easy; keeping it can be pretty difficult. Some would say that the front head lock position is transitory and you should not rely on keeping some one there. Others would say you have time to work and that it is okay to spend as much time as needed there. I think that it is a question of your skill set and that of your opponents. If you have fantastic control there and your opponent has no answer to that, you are winning and will win the position. Vice versa, you will lose the positional control really fast.
Controlling the position is a matter of weight, hand, and balance placement; don’t forget about your legs.
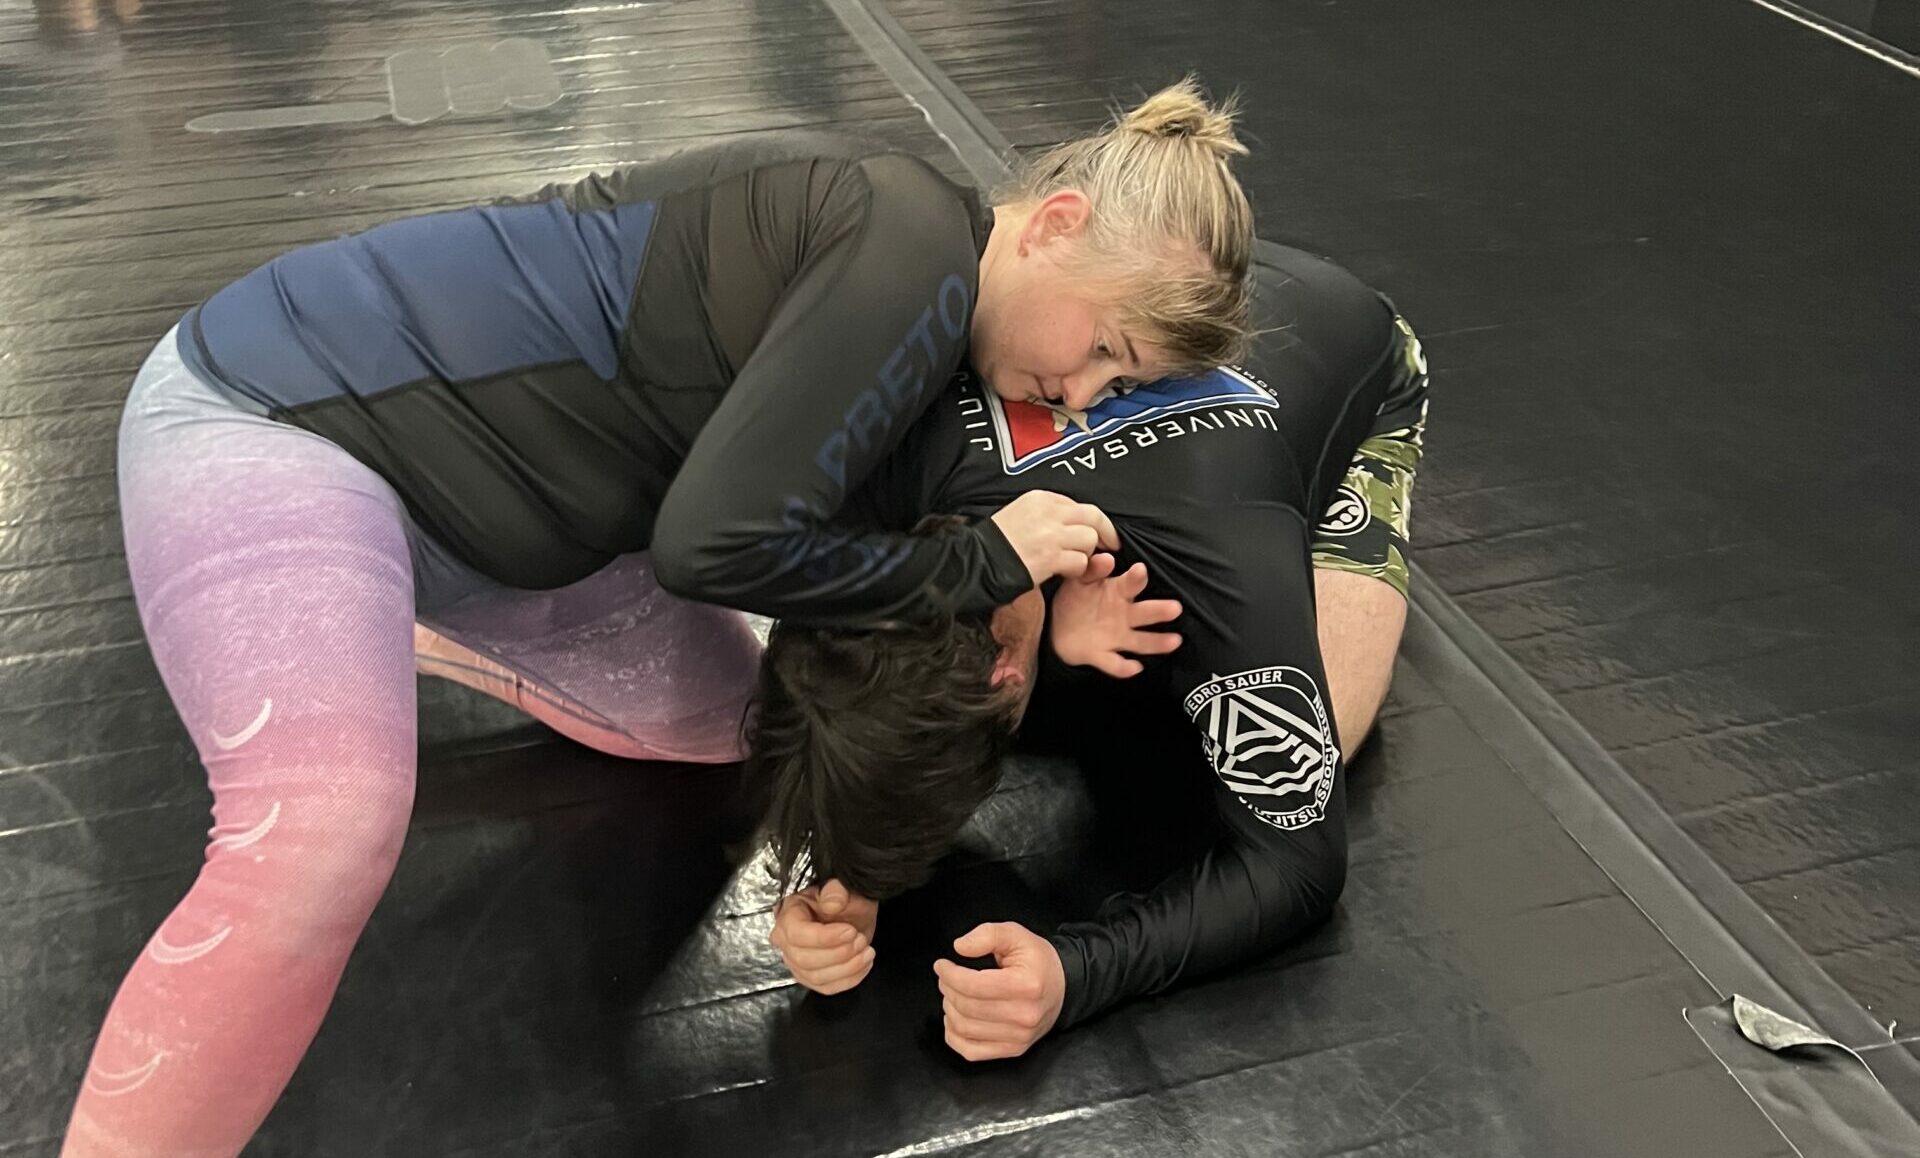
The first hand positions is usually the easiest to remember. The hand with the arm closes to the neck is usually used as a chin strap for control. This grip prevents your opponent from longitudinal movement — along the spine of your opponent. Your second hand, which could be argued as equally important to the first, needs to make contact with your opponent’s arm on the same side. I prefer two different grips here. Both have their uses and application. First setup would be palm facing inwards and monkey pawing the tricep from the outside. The second is palm facing outwards but still pawing the tricep except from the inside of the arm. The grip helps to control but does not eliminate the rotational movement by your opponent.
Now we need to place our weight properly and set our balance to deal with the uncontrolled portion of our opponent at this point — their lower body. They aren’t simply going to be able to bench press out of the front head lock position; disregard Bob, Jeremy, and Mike who certainly can just throw most people around and fully stand up even if we had arm control of the Hulk. I recommend a really fast transit through the front head lock position to an attack of position or submission for those types of people.
Anyways, with the chin strap and tricep control in place, the shoulder of your chin strap arm should be over the back of your opponents neck. This will undoubtedly make it difficult for them to wrestle up and make those who want to “sit-out” a little more hesitant as that chin strap is firmly in place. The added benefit is that when moving to a positional attack, you can walk yourself backwards and break them down with your weight pouring over them the longest lever point to their spine.
Balance, well base. Whichever you prefer, it doesn’t change that we can’t control our opponent in this position without using our legs. I always prefer a sudo version of “three points of contact” here. Your leg on the same side as the chin strap should have it knee down (1) while keeping active toes (2). Lastly, leg on the same side as your tricep/arm control should have the knee up (3).
With our front head lock position in place, let’s ATTACK!
First, the D’arce. Let’s clear something up first. As this always seems confuse people on what a D’arce is vs an Anaconda. A D’arce has the strangling arm entering from your oppoenents arm pit with the fore arm making contact with the neck on the opposite side.

An Anaconda has the strangling arm starting the neck and the fore arm pressing the opponents arm into their coroded artery by the far arm pit.
Okay, back to the D’arce from the front head lock position. Due to our proper positioning of the front head lock position we have to shift our angle to enter into the D’arce. Remember, our knee on the chin strap side is still on the ground at this point. To get our choking arm into the correct position, we must change that. A few things are going to need to happen at the same time. First, switch which knee is on the ground and which is not. Second, your ear that is on the same side as the knee now going to the ground needs to make contact with your opponents back. Third, our tricep control arm becomes our choking arm and you have to reach as far as you around the far side of the neck. The same side of the neck that your chinstrap arm was entering. If you are far enough, you should be able to see your fingers with your ear touching your opponent. Fourth, your chin strap hand connects to your choking hand. The orientation of your hands does matter here: Your choking hand needs ot have the palm out, and your other hand needs to have your palm facing your when they lock together. From here on out, your hands/arms should never disconnect. We will call your chinstrap hand/arm your “non-choking” hand/arm for now. Lastly, we need to make sure that you non-choking forearm is on the back of your opponents head.
Now for my favorite part of this whole technique.
With your choking hand and your non-choking hand connected, keep your elbows close together and your hands as close to your chest as possible. In one motion, try to use your connected hands to pull your opponents head under their armpit that is closest to you while pushing with your out side leg that now has it’s knee up.
Our opponent should now be on his side, your spine should perpendicular to your opponents from the transition above and we are nearly ready to finish this opponent. This is when you should, without disconnecting your arms completely, slide your non-choking arm along the palm of your choking arm and complete your figure of four with your arms. A couple other things to consider here:
- Where is your opponents arm that is inside your arm triangle?
- Where is your choking arm in relation to the farside coroded artery?
Let’s find a proper position for both. If the arm of your opponent is to high on the head, you will not acheive the pressure needed on the near side coroded artery. If your forearm is not touching the coroded artery on the far side, that needs to change. Each of these situations reduced your effectiveness at acheiving “double closure” — applying pressure to both coroded arteries at the same time. Answer to problem 1: Use your driving leg, or outside leg to move the arm lower on your opponents neck. Problem 2: shift your hips to be closer to your opponent’s hips.
Once you are in the proper position, it is time to finish this already defeated opponent. Do it with a smile though, you never know who is recording. We are going to finish by pulling, really rotating, your choking arm’s elbow towards yourself. With doubl closure contact, this should not take much. A little chest forward pressure like you puffing your chest out helps too. You can drop your hip that is closest to your opponents hips as well to give your elbow more room to rotate as well.
There, you just wrecked your opponents days with a savage D’arce. Keep Reading for the Anaconda.
The Anadconda. This was one of the first submissions I watched on YouTube and tried in a class. I was in the Gi, finished my training partner and felt like a gangster. Although, knowing what I know now, I probably should have never been able to finish it the way I did. Sucks to be the other guy. Just kidding. If you never try, you never learn.
Let’s get into it.
We are going to start from the same position, the front head lock. First step is going to be a centerline shift. The shift is the relation of your spine, which is in line with your opponents at this time, towards your chinstrap arm. From there, hug your opponent. If you watch the video this will make sense. It is really strong controlling position and can lead to a devastating choke when used in this manner. The hug should have one of your opponent’s arms inside. The same arm that you had your tricep control with. The last important part of this hug is that you chinstrap hand should be the one on the bicep in the hug. Almost like you are crossing your arms all angry in the corner of some place you don’t want to be.
Here we have two options to get our opponent where we need them to finish. The first is the more traditional entry of the Anaconda — tuck your head under your opponent on the same side of the arm that is stuck inside your hug and roll. The other is to use your opposite knee, the one that was on the ground to push your opponent’s head down and flop them over.
Once your opponent is on the ground, we need to transition to our figure of four lock with our arms and hands. Due to our proper hand configuration with the hug, we should be able to slap our non-choking hand as high as we can towards our own face. However, if your opponent reachs to defend your hips and fights for elbow position with their arm that is inside the hug, you can go into a pike position and capture their elbow to pull it down before you lock up the figure of four.
Once the lock is established, finish the same way we finished the D’arce. Pull your choking arm’s elbow down to your side rotating your elbow behind you as much as you can. If the finish is still not there, instead of puffing your chest up, use your legs to lift your chest/belly into the back of your opponent’s head while you are rotating your elbow back.
Full Video
Boom, super powerful finishes from a strong starting point. Each of these attacks are a version of an inverted Kata Gatame — Arm Triangle, depending on where you read. This page has been great for understanding the traditional naming conventions when I get lost in the sauce. Give these a shot and see how it works for you. Post your experiences with either in the comments below.
